

Here’s how to create a customer account (or user account) on our web application, and access your personal space to view your information, check the remaining credit, and possibly deposit credits to use our advanced features.
Sommaire
Using the registration form
The input fields
To begin, the customer account must be created by filling out a form with your business information, or personal if you use the service as such. The data entered will only be used in the course of the Open Street application, troubleshooting and possibly billing. We never give out this information to third-party companies or organize spam.
The registration form is accessible through the website’s registration button. Below is what this form looks like.
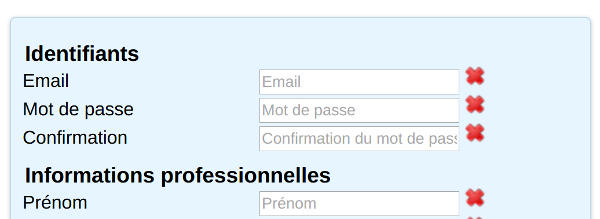
Registration form
The form fields should show a green check mark in place of the red crosses, indicating that the field has been entered correctly. For example, an e-mail address has the character (@) and a domain name.
Submitting the form
Once the form has been submitted, you should note your registration is correct through a message to that effect.
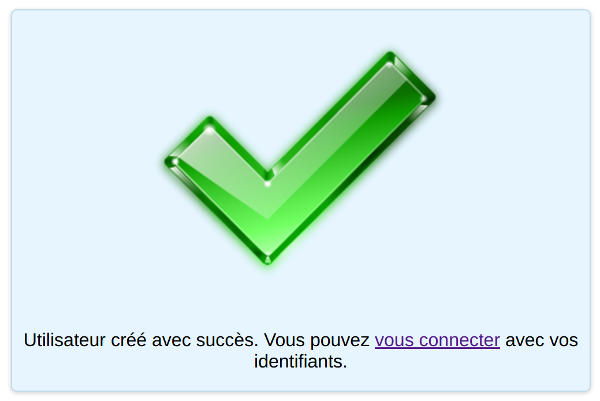
The account has been created
Access to the web application
Signing In
The web application can be accessed through the sign in button at the top of this website. You can enter your username (email address) and your password and click on “Send”. The application should normally give you a “Hello, <surname> <name>”. This indicates that your account has been correctly identified with your information.
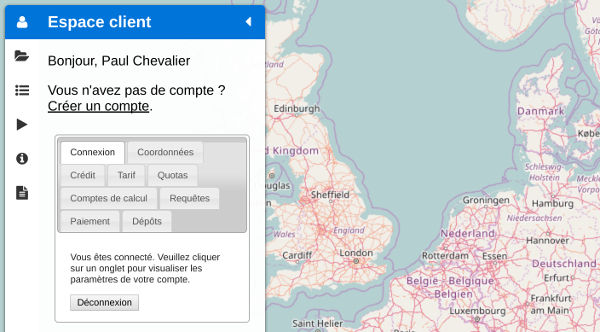
After signin in
If you do not see your first name and last name at the top of the menu on the left, please log out and sign in until this happens (see illustration above).
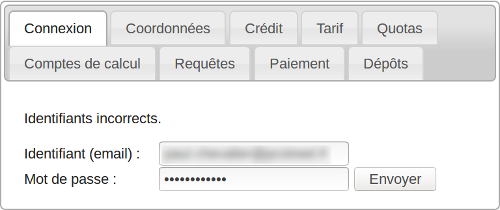
In the event of a connection failure, «Incorrect identifiers» appears just above the identifier field (see image below). In this case you can contact us to reset your password.
Incorrect credentials
The tabs in the customer personal space
The customer area is the part of the web application that offers the tabs: Log in, Contact details, Credit, Tariff, Quotas, Calculation accounts, Queries, Payment and Deposits. Here is a description of each of these tabs
- Connection: connection and disconnection button
- Contact information: a summary of your contact information used for billing, if applicable.
- Credit: reminder of your credit.
- Rate : applicable fee schedule.
- Quotas : quota grid to combat usage abuse.
- Calculation accounts: here you can consult your API key and create new ones. If you do not know what it is, this tab will not serve you.
- Queries: reminder of the last optimization requests you made.
- Payment: to make the payment that allows to deposit a sum on your customer account.
- Deposits: reminder of payments and invoices.
You now know how to sign up for the app and log in. To go further, check out the other pages on how to use our service.